
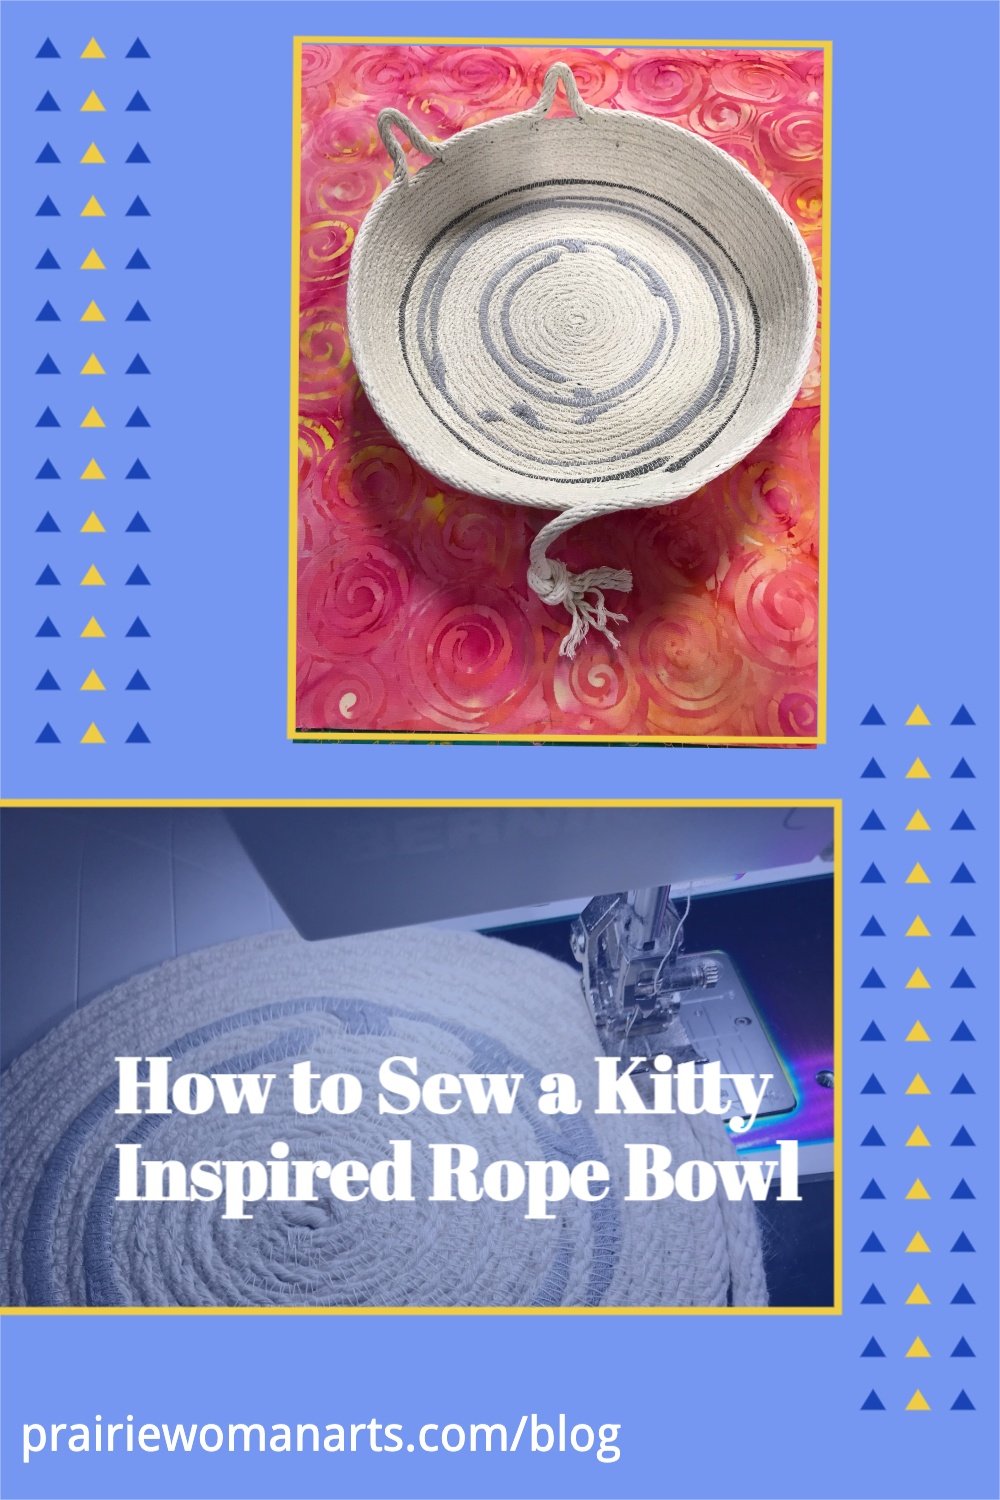
How to Make a Kitty Inspired Rope Bowl
/
This is a short tutorial to show you how to give your cotton rope tray or bowl an abstract, feline vibe.
The rope I’m using for this basket is 1/4” sash cord from Tractor Supply. I stocked up on it, before I found the American made rope that I order in large spools now. This sash cord has a polyester center, so it doesn’t stretch much and makes for a firm bowl that doesn’t slouch. I like using it, I just wish it was made in America.
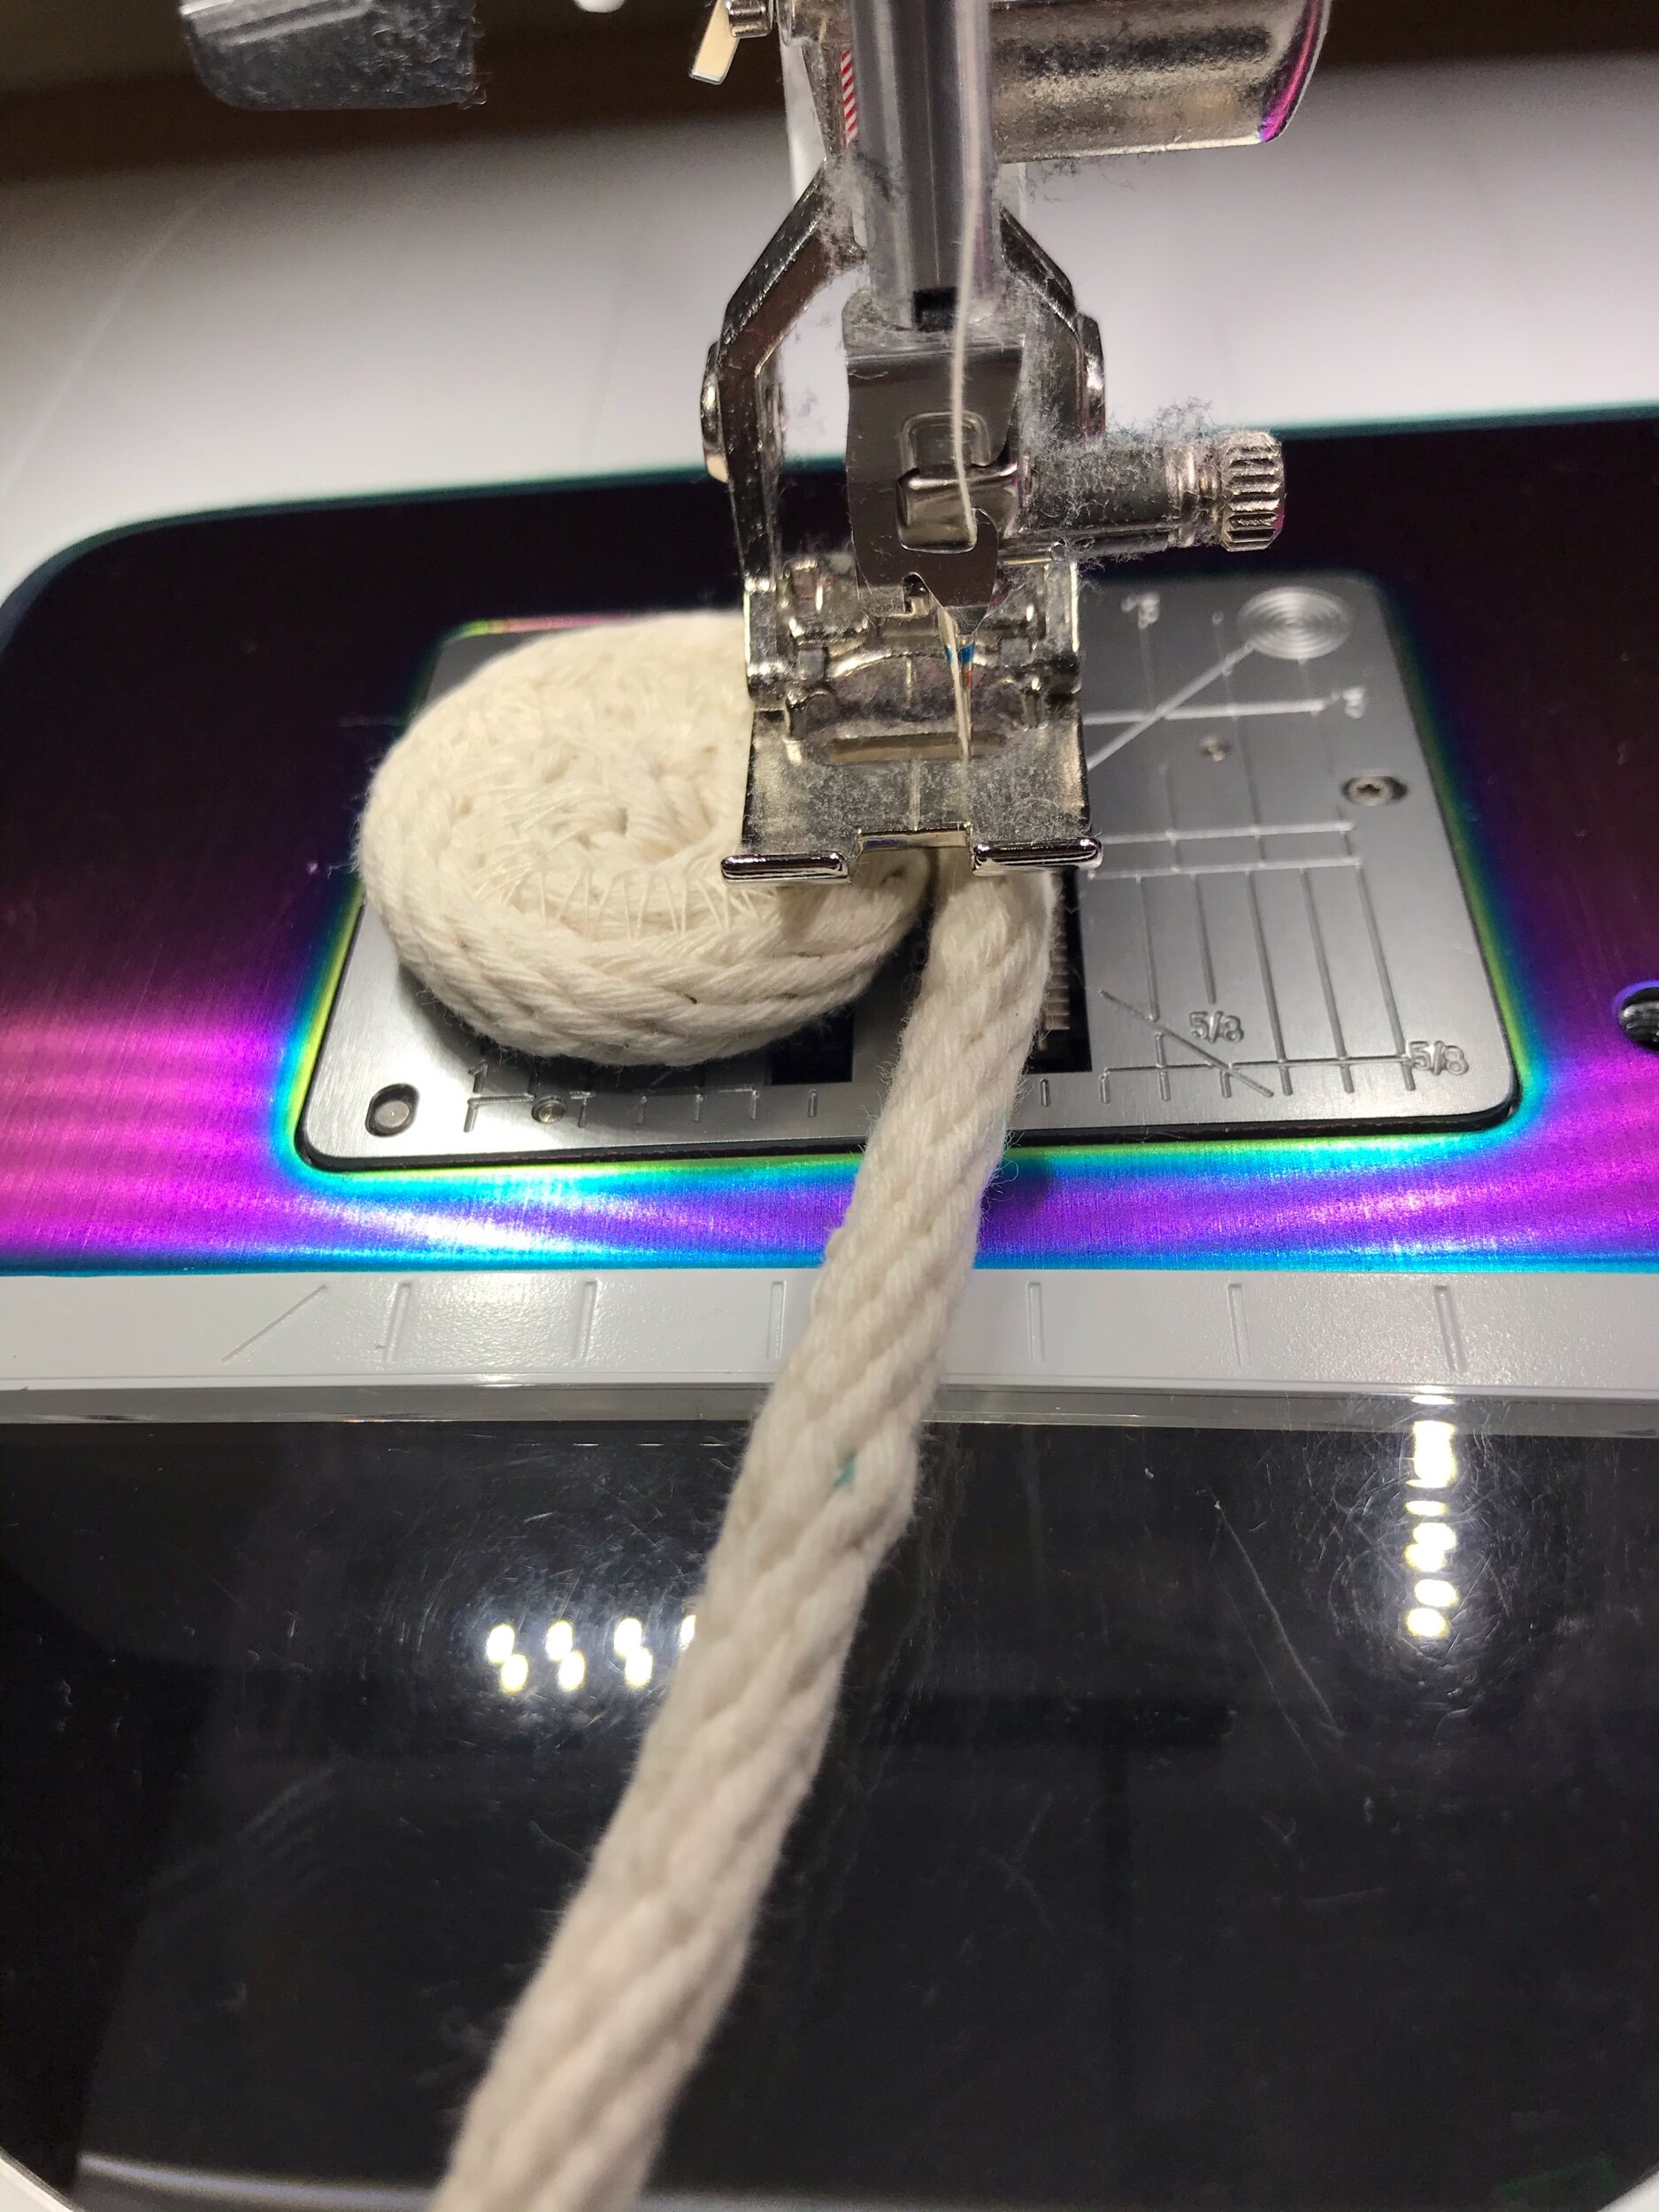
Start your cat rope bowl in the center. This bit is always the fiddliest part. Make a small coil and stabilize with pins just to hold until you get the stitching started. It’s never a good idea to sew over a pin, so I take the first stitches really slowly and pull the pin out as I get to it.

Start your Cat inspired rope bowl, just like a regular rope bowl.
2. My zigzag is set to 1.5 stitch length and 5.5 stitch width, and I’m using a size 90 jean needle. Secure the first few zigzags, back and forth, then continue zigzagging around the spiral, always stopping with the needle in the rope, before you adjust it.
Let me give you a bit of friendly advice. There is no perfection here. You are zigzagging on rope! Embrace the wobbly stitches as part of the art you are creating!
Story Pin - Kitty Rope Bowl https://pin.it/3XY6vka
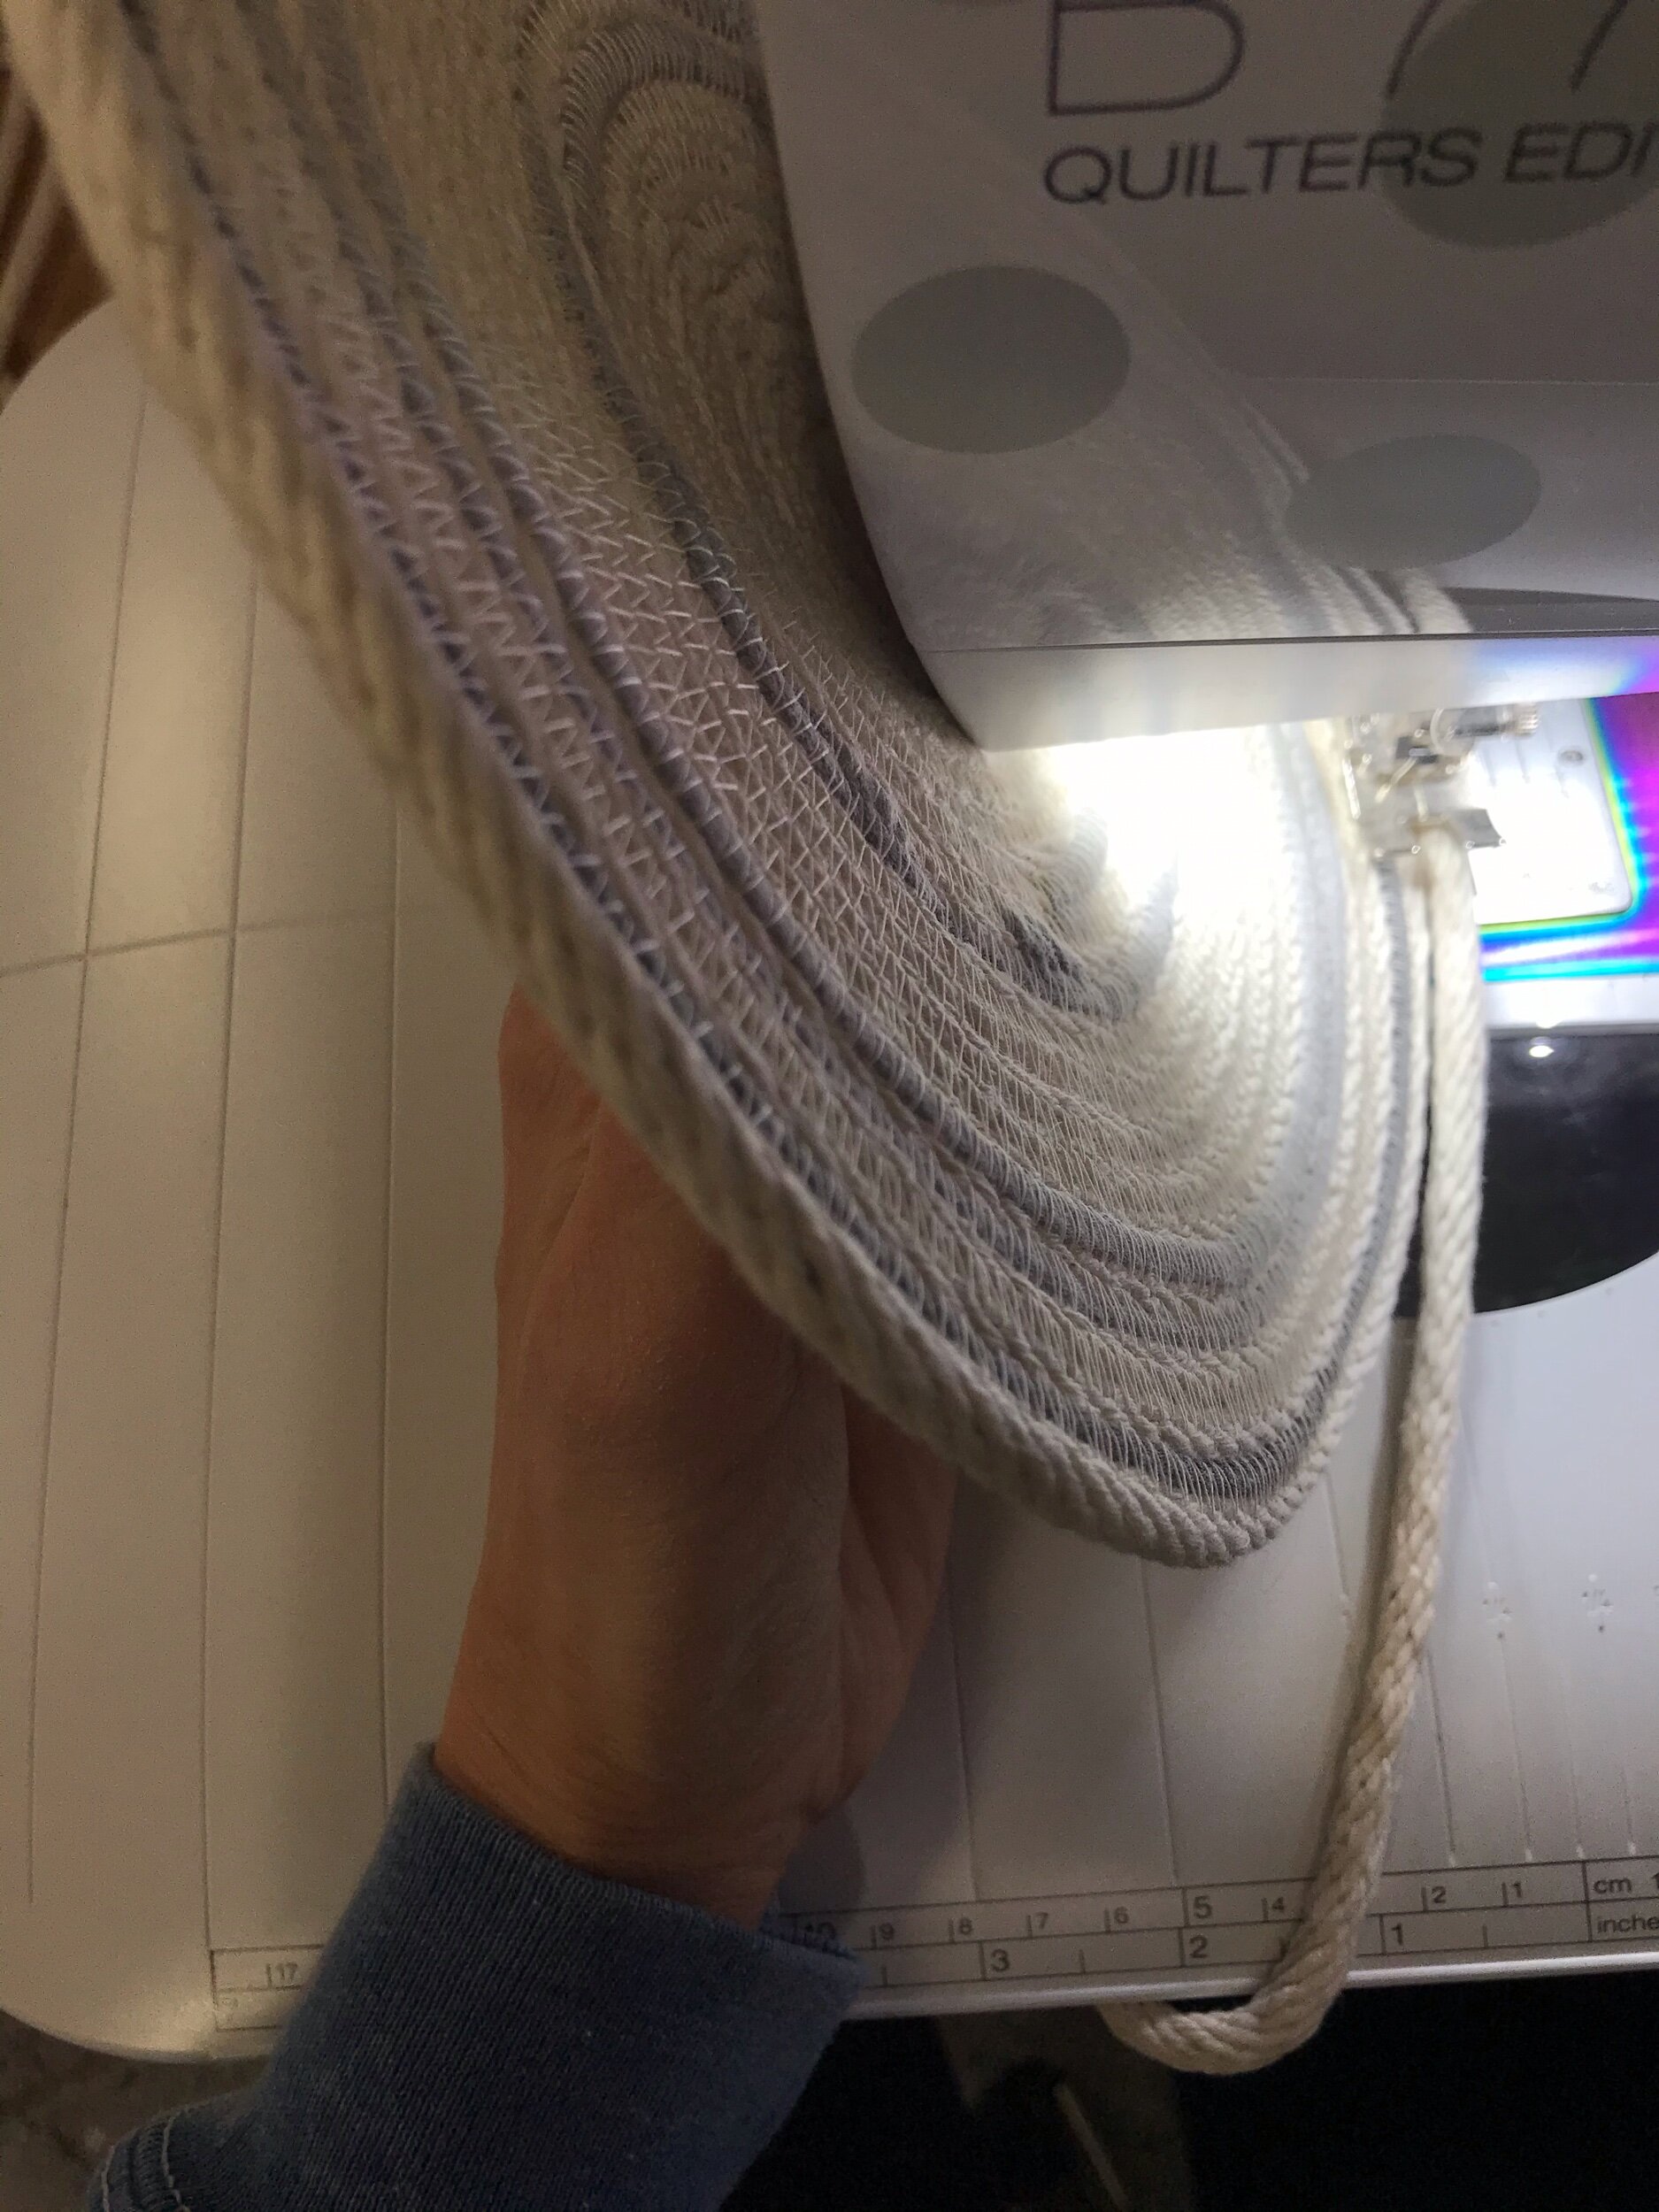
3. Once you get a couple of inches from the center, you don’t have to stop and start so much. Keep zigzagging around and around until the base is the size you want for your bowl.

The embellishment you see is another cord that I couched down as I was creating my bowl. I will teach that in another tutorial.
4. To make the sides on your bowl, once your base is done, you use your left hand and tilt the base up as tight to the machine as you can get it. This is where you can play around with the shape. The more perpendicular the base is to the needle, as you continue zigzagging, the less flared the sides of the bowl will be.
There are no rules! Have fun!
5. When the bowl is the size you want it, stop with your needle in the rope, and make 4 marks for the ears, so you know where to start and stop each ear. I used my index finger, tip to first knuckle to measure out the rope for the ear. You can use a ruler, if you wish! For the first ear, shorten your zigzag length to .75 and reinforce by backstitching 1/2” from your first mark. Stop, with needle in the rope on the left side. Bend the rope away from the bowl and either straight stitch an inch or keep zigzagging, then bend the rope back down to the bowl at the second mark. Hold firmly in place with a pin, and zigzag 1/2”, backstitch to secure, and zigzag to the 3rd mark. Repeat for the 2nd ear.

6. Change your zigzag stitch length back to 1.5 or whatever you had it set to for the rest of the bowl. Directly opposite from the center between the ears you just made, make a mark so you know where to stop for the tail. At that mark, shorten stitch length again, backstitching 2-3 times to secure the rope.
7. Cut the rope 8” from the bowl and tie a knot, leaving 1-2” for the fringed tail end.
Congratulations! You just made your first cat rope bowl! I hope you’ll tag me on Instagram@prairiewomanarts so I can see your bowl!

This is a short tutorial to show you how to give your cotton rope tray or bowl an abstract, feline vibe.
I’ve said it once, and I’ll say it again! My hat is off to my wonderful friends who write how-to tutorials. It’s harder than it looks! Please leave a message or shoot me an email if you have any questions or if the way I shared this project doesn’t make sense, and I’ll do my best to help you!
“In ancient times cats were worshipped as gods; they have not forgotten this.”
